
If you have never placed a trade in your life, this guide is for you. We are going to walk through one complete futures trade from start to finish — the platform, the order ticket, the bracket, the sizing, and the part almost nobody teaches beginners: what to actually do once you are in. No jargon gets past us without a definition. By the end you will understand the mechanics well enough to place a tiny, controlled practice trade on Monday.
We are going to move slowly on purpose. A real trade has maybe six moving parts, and most beginners get hurt not because the market is a genius but because they fumbled one of those six parts under pressure. Learn the parts cold now, while nothing is on the line, and the market becomes a much less scary place.
What "futures" actually are, in plain English
Let's start at the very bottom, because "futures" is one of those words people throw around like you already know it.
A future (or "futures contract") is just an agreement to buy or sell something at a set price, on a set future date. That's the whole idea. The "something" can be oil, gold, wheat, or — the one most new traders start with — a stock market index, which is a number that tracks a big basket of stocks all at once.
Here's the friendly version. Imagine you agree today to buy your neighbor's entire apple harvest three months from now at $2 a pound. If apples get expensive, your deal looks great — you locked in a low price. If apples get cheap, your deal looks bad. You didn't buy apples today; you bought an agreement about apples. That agreement itself now has value that goes up and down. Futures traders almost never want the apples (or the oil, or the actual stocks). They just buy and sell the agreement, trying to profit from the price moving.
The key thing that makes futures different from buying a stock:
- You can bet on price going up OR down. Buying to profit from a rise is called going long. Selling first to profit from a fall is called going short. (Yes, you can sell something before you own it in futures — the contract is designed that way. Don't overthink it yet.)
- You control a big amount with a small deposit. This is called leverage, and it is the single most dangerous word in this whole guide. We will come back to it, hard.
Why a total beginner should care about micros
Here is the number that scares people away from futures: a single standard S&P 500 futures contract (its ticker is ES) moves $50 for every one point the index moves. The S&P routinely swings 40–50 points in a day. That's $2,000–$2,500 of movement on one contract. For a beginner, that is a heart-attack machine.
Now here is the number that makes futures learnable: there is a smaller version called a micro. The micro S&P 500 contract (ticker MES) moves only $5 per point — one-tenth the size. Same market, same chart, same everything, at one-tenth the speed of pain.
There is also a micro Nasdaq (MNQ, $2 per point), a micro gold, a micro oil, and more. Micros exist precisely so that normal people can practice with real money without betting the rent. At Hollow Point Trading, we treat the micro not as a "lesser" contract but as the correct beginner tool — the training wheels that are also a real bike.
Why you should care: micros let you make every beginner mistake you are going to make — and you will make them — for a few dollars instead of a few thousand. That is the difference between a tuition bill and a blown account. Protecting your capital comes before every clever idea you will ever have. If you remember one sentence from this article, make it that one.
The words you need before you touch the platform
Let's lock in the vocabulary. Read this section twice. Every one of these words shows up on the order ticket, and confusion here is where beginners lose money by accident.
- Tick — the smallest amount a price is allowed to move. For MES, one tick is 0.25 index points, and because MES is $5 per point, one tick is worth $1.25. Think of a tick as the "penny" of your contract.
- Point — one full index point. For MES that's 4 ticks and $5.
- Long — you bought; you profit if price goes up.
- Short — you sold first; you profit if price goes down.
- Order — an instruction you give the platform: buy this, sell that, at this price.
- Market order — "fill me RIGHT NOW at whatever the current price is." Fast, but you don't control the exact price.
- Limit order — "fill me ONLY at this price or better." You control the price, but you might not get filled.
- Stop-loss (or just stop) — an order that automatically closes your trade at a set price to cap your loss. This is your seatbelt. You never drive without it.
- Target (or take-profit) — an order that automatically closes your trade at a set price to lock in your win.
- Bracket — an entry order with a stop-loss AND a target attached, so the moment you're in, both exits are already waiting. This is the beginner's best friend and we will build one by hand.
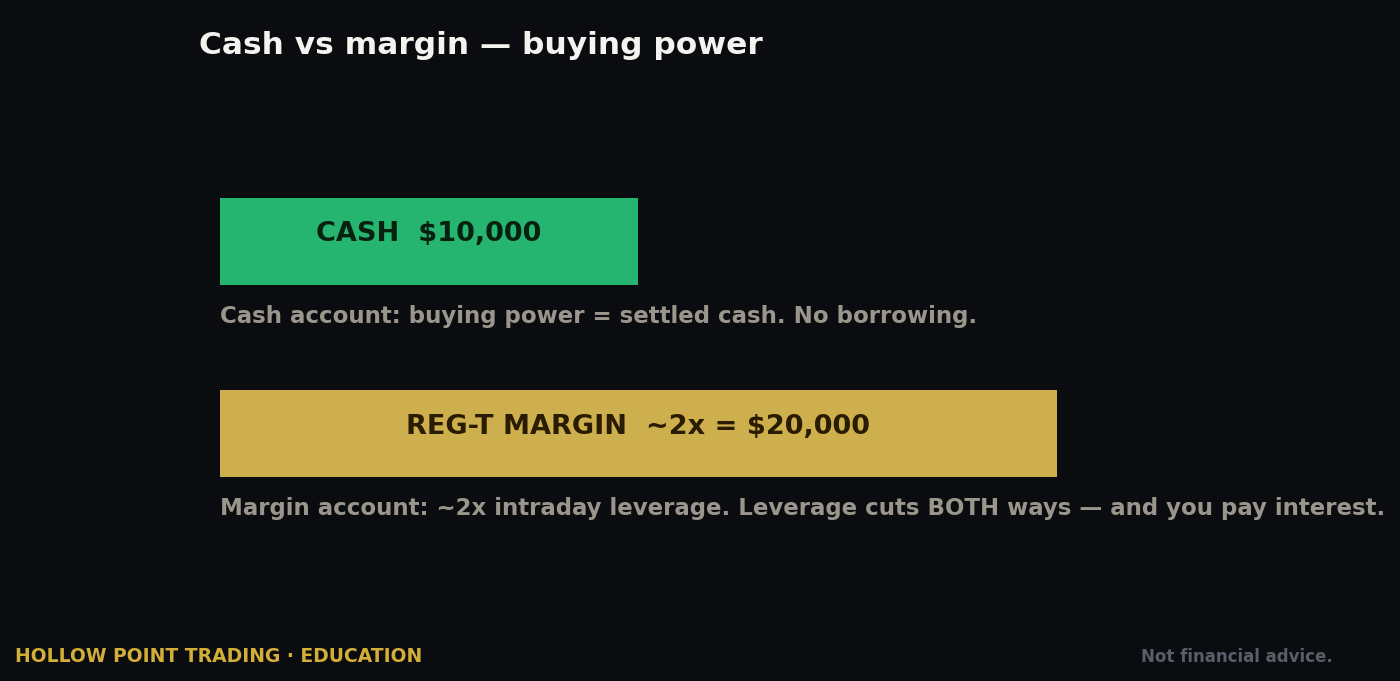
- Margin — the deposit your broker requires to hold a contract. For one MES you might only need a few hundred to a couple thousand dollars posted, depending on the broker and time of day. Margin is NOT the most you can lose — that's the trap in leverage. You can lose more than the margin if you have no stop. Which is exactly why you always have a stop.
Step 1 — The platform, and paper trading first
A trading platform is the app you place orders in. Common beginner-friendly ones include the platform your futures broker gives you (Tradovate, NinjaTrader, TradingView connected to a broker, and others). They all share the same bones: a chart (the price picture), an order ticket (where you type your buy/sell), a positions panel (what you currently own), and an account panel (your money).
Before real money, every good platform offers paper trading — also called a demo or sim account. This is a full simulator using live prices and fake money. It is not optional for you. It is where you place your first fifty trades. Nobody learns to drive in traffic on day one; you learn in an empty parking lot. Paper trading is your parking lot.
Your job in the sim, before a single real dollar: place ten trades where you correctly set an entry, a stop, and a target as a bracket, and let each one finish on its own without you panicking and clicking things. Not ten winning trades — ten correctly structured ones. Structure is the skill. Winning follows structure; it never precedes it.
Step 2 — Reading the order ticket without fear
The order ticket is a small box, usually on the right side of the screen. It looks intimidating because it has a lot of little fields. It is not. Here is every field that matters and what to put in it.
- Symbol — which contract. Type
MES. (Platforms add an expiration code likeMESU2025; pick the front-month, meaning the nearest active one — the platform usually defaults to it.) - Quantity — how many contracts. For your first real trade, this is 1. Not two. One.
- Buy / Sell — which direction. Buy = long, Sell = short.
- Order type — Market or Limit (defined above). Beginners: use a Limit order to enter, so you know your exact entry price. Use market orders only later, once you can handle not knowing the fill to the penny.
- Price — the price for your limit order.
- Stop and Target fields (on platforms with built-in brackets) — where your seatbelt and your prize sit.
That is genuinely it. Everything else on the ticket is a detail you can ignore for now. A trade is: which contract, how many, which direction, at what price, get out here if wrong, get out here if right. Six answers. Fill in six answers and you have placed a trade.
Step 3 — The bracket: entry, stop, and target as one unit
This is the most important section in the whole guide, so we are going to build a bracket by hand, slowly.
A bracket is three prices that belong together:
- Entry — where you get in.
- Stop-loss — where you admit you were wrong and get out for a small, known loss.
- Target — where you were right and you take your money.
The reason we set all three before entering is simple and it is about your brain, not the market. Before you're in a trade, you are calm and rational. The moment real money is moving against you, you are not — you're a scared animal looking for reasons to hope. A bracket is a decision your calm self makes for your scared self. It's a promise you can't un-promise once the fear kicks in.
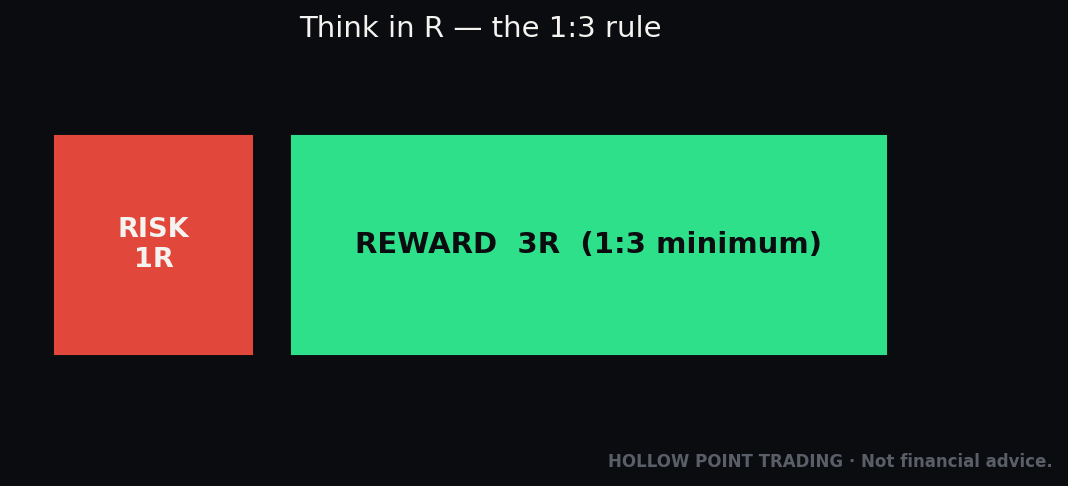
Here's the HPT rule that shapes every bracket we build: 1:3 reward-to-risk. That means your target must be at least three times as far away as your stop. If you're risking 8 points to your stop, your target must be at least 24 points away. Risk one, aim for three.
Why does this matter so much? Because it means you can be wrong more often than you're right and still make money. Watch this: if you risk $10 to make $30, and you win only 4 out of every 10 trades, you make $120 on winners and lose $60 on losers — up $60, while being wrong 60% of the time. The 1:3 ratio is what lets ordinary humans, who guess wrong constantly, still come out ahead. It is mathematical armor against your own imperfect judgment.
Step 4 — A fully worked first trade, from click to close
Let's do a complete, realistic MES trade with real-ish numbers so you can see every step. Follow along as if it were Monday morning.
The setup. Say the S&P 500 futures are trading around 5,000. On the chart, you notice price has bounced off the 5,000 round number twice already this morning — a round number is often a level where buyers show up, the way a store shelf priced at $9.99 feels different from $10.01. You decide you want to go long (bet up) if price is holding above 5,000, aiming for a move toward the morning's earlier high near 5,030.
This is a beginner-simple read, and that's the point. We are not here to teach a fancy strategy today; we are here to teach mechanics. The read is: "buyers keep defending 5,000, so I'll join them with a tight leash."
Building the bracket:
- Entry: Buy 1 MES with a limit order at 5,002 (just above the level, confirming buyers are in control).
- Stop-loss: 4,994 — that's 8 points below entry. If price falls back under the level by that much, your read was wrong. Get out.
- Target: 5,026 — that's 24 points above entry. That's your 1:3 (risk 8, reward 24). ✓
Now let's price the risk in dollars, because this is where beginners get their reality check:
- Risk = 8 points × $5/point = $40 at risk on this one micro contract.
- Reward = 24 points × $5/point = $120 potential if the target hits.
Forty dollars. That is the entire downside of your first real trade if you follow the plan. Not $4,000. Forty. That is why we start with a micro.
Placing it. In the ticket: Symbol MES, Quantity 1, Buy, Limit 5002.00, Stop 4994.00, Target 5026.00. On a bracket-capable platform you type all three and hit submit once; the platform holds the stop and target and arms them automatically the instant your entry fills. On a simpler platform, you place the entry, and the second it fills you immediately place the stop and the target as two separate orders. Either way, both exits exist before you take your first breath as a trade-holder.
What happens next — the three endings. A trade only ever ends three ways, and all three are fine if you followed your plan:
- Target hits. Price grinds up to 5,026. Your target order fires, you're out, +$120. You did nothing but wait. That's correct.
- Stop hits. Price sags to 4,994. Your stop fires, you're out, −$40. You also did nothing but let it work. This is a good trade that lost money — and yes, those exist. A good trade is one where you followed your rules; the outcome is the market's business, not yours.
- You close it yourself for a reason (we'll cover managing below). Fine — as long as it's a planned reason, not panic.
Notice what is NOT on that list: "I moved my stop lower because I was sure it would come back." That's not an ending. That's how a $40 lesson becomes a $400 disaster.
Step 5 — Managing the trade without wrecking it
Here is the paradox of your first trade: the best management is usually almost none. You built the bracket precisely so you wouldn't have to make decisions while emotional. So the default answer to "what do I do now?" is: let the bracket work.
But there are a few legitimate, planned management moves worth knowing. Use these only once you're comfortable, and never as an excuse to widen a stop.
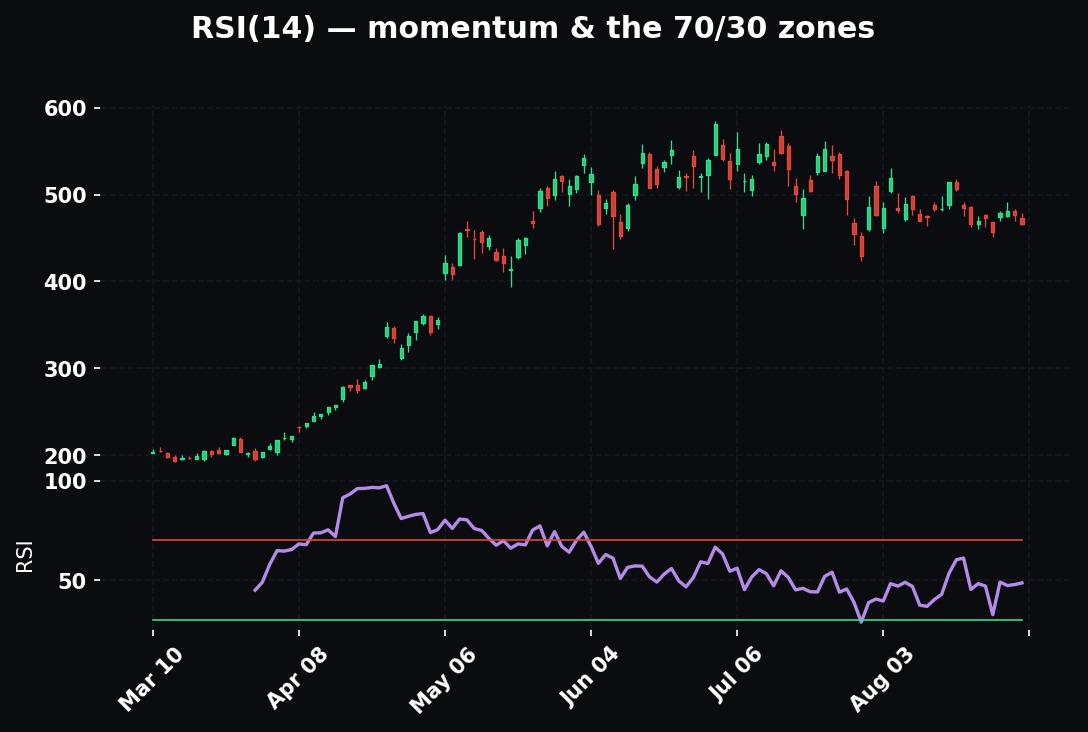
- Moving your stop to break-even. Once price has moved meaningfully in your favor — say your MES trade is up 12 points — you can slide your stop up from 4,994 to your entry at 5,002. Now the worst case is a scratch (roughly zero loss). This protects a winner. You only ever move a stop in the direction of less risk, never more. This is a one-way ratchet. Burn that into your brain.
- A trailing stop. Some platforms let a stop automatically follow price up as the trade wins, locking in more and more. Fine tool, later. For your first ten trades, a fixed bracket is cleaner and teaches you more.
- Scaling out. With two contracts you could take one off at a first target and let the second run. Ignore this entirely for now — you're trading ONE contract, so there's nothing to scale. It's here so the word doesn't spook you later.
The one management rule that overrides all others: never move your stop-loss further away from your entry. The stop is where you were wrong. Moving it to give a losing trade "room to breathe" is just choosing to lose more. Almost every blown beginner account dies from this exact move, done once, badly, at the worst moment.
Step 6 — Closing the trade and writing it down
When the target or stop fires, you're flat (flat = holding no position, back to just cash). Confirm in your positions panel that you have zero MES. This matters more than it sounds: beginners sometimes think they're out when a stop only partially filled, or when they placed the bracket wrong and a leftover order is still live. Look at the positions panel and confirm you're flat. Every time.
Then do the thing that separates traders from gamblers: write it down. A trade journal doesn't need to be fancy. One line per trade:
MES long 5002, stop 4994, target 5026. Reason: buyers holding 5000 round number. Result: target hit, +$120. Followed plan? Yes.
That last column — Followed plan? Yes/No — is the only one that measures you instead of the market. Your goal for your first month isn't a green account. It's a journal full of "Yes." String enough "Yes" together and, thanks to the 1:3 math, green follows on its own.
The beginner mistakes to avoid (learn these free)
Every one of these is a mistake thousands of beginners have already paid for. Read them so you don't have to buy the lesson yourself.
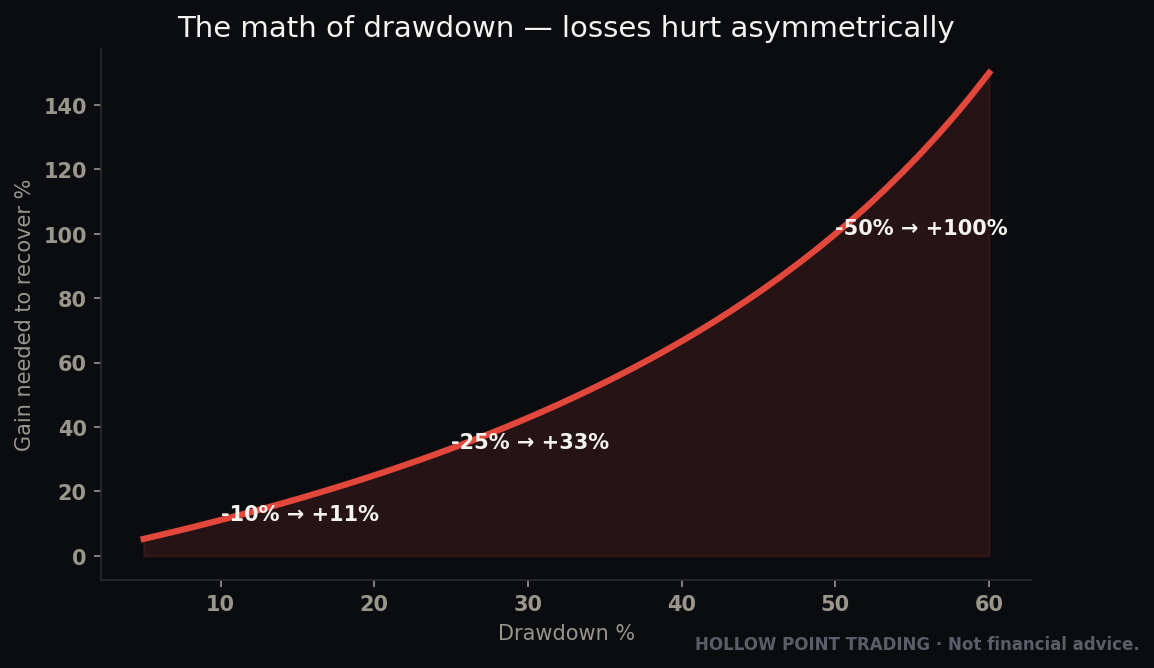
- Trading without a stop-loss. This is the cardinal sin. Leverage means a stopless trade can eat far more than you planned, fast. No stop, no trade. Ever.
- Starting on the full-size contract. ES ($50/pt), NQ ($20/pt) — these are not beginner tools. One bad NQ trade can be a $1,000 lesson. Start on micros. Graduate later, if ever.
- Using too many contracts. "One micro barely makes anything" is the thought that precedes a five-micro position and a five-times-bigger loss. Size is not where you find your edge. Survival is.
- Moving the stop to avoid being wrong. Covered above. The account-killer. Your stop is sacred.
- Revenge trading. You lost $40, so you immediately slam into another trade to "get it back." That trade isn't a read; it's an emotion. Losses feel personal — the market has no idea you exist. Step away after a loss.
- Skipping the sim. "I learn better with real money." No — you panic better with real money. Sim first.
- Trading around big news blind. Economic reports and Federal Reserve announcements can make price leap dozens of points in a second, right through your stop. As a beginner, simply don't hold trades into scheduled major news until you understand it.
- Overtrading. Ten mediocre trades a day isn't ten times the opportunity; it's ten times the commissions and ten times the chances to break a rule. Fewer, cleaner trades win.
- Chasing. Price already ran to your target level without you, so you jump in late, right where you should be taking profit, not entering. If you missed it, you missed it. There's another bus in ten minutes.
How much money can you actually lose? (The leverage talk)
We keep circling leverage because it is the thing that turns futures from a tool into a trap. Let's make it concrete.
Leverage means your small margin deposit controls a large position. One MES at 5,000 controls a notional value of 5,000 × $5 = $25,000 of S&P exposure, even though the broker might only ask you to post a few hundred to a couple thousand dollars to hold it. That ratio is the leverage. It cuts both ways with brutal symmetry: a move that would be a rounding error on $25,000 of stock is a big percentage swing on your small deposit.
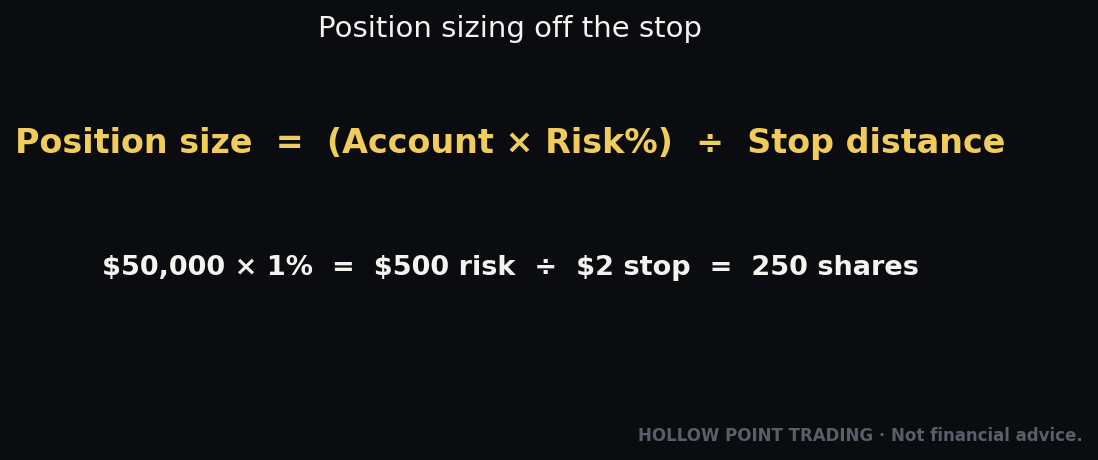
This is why the stop-loss is non-negotiable and why position size is your real risk control. You don't control whether the market moves against you — you control how many contracts you're holding when it does, and how far away your stop sits. Those two numbers — contracts and stop distance — are your risk. Nothing else.
A clean beginner rule from the HPT playbook: risk no more than a tiny fixed dollar amount per trade — for a small account, think $25–$50, exactly the kind of number one micro with a sensible stop produces. If a trade's stop would risk more than that, you don't widen your comfort; you either move the stop closer to a logical level or you skip the trade. The size bends to the risk limit. The risk limit never bends to your excitement.
Where this fits the bigger Hollow Point picture
Everything above is mechanics — the how. HPT's larger philosophy is the when and why, and it's worth seeing how today's tiny trade slots into it, even as a beginner.
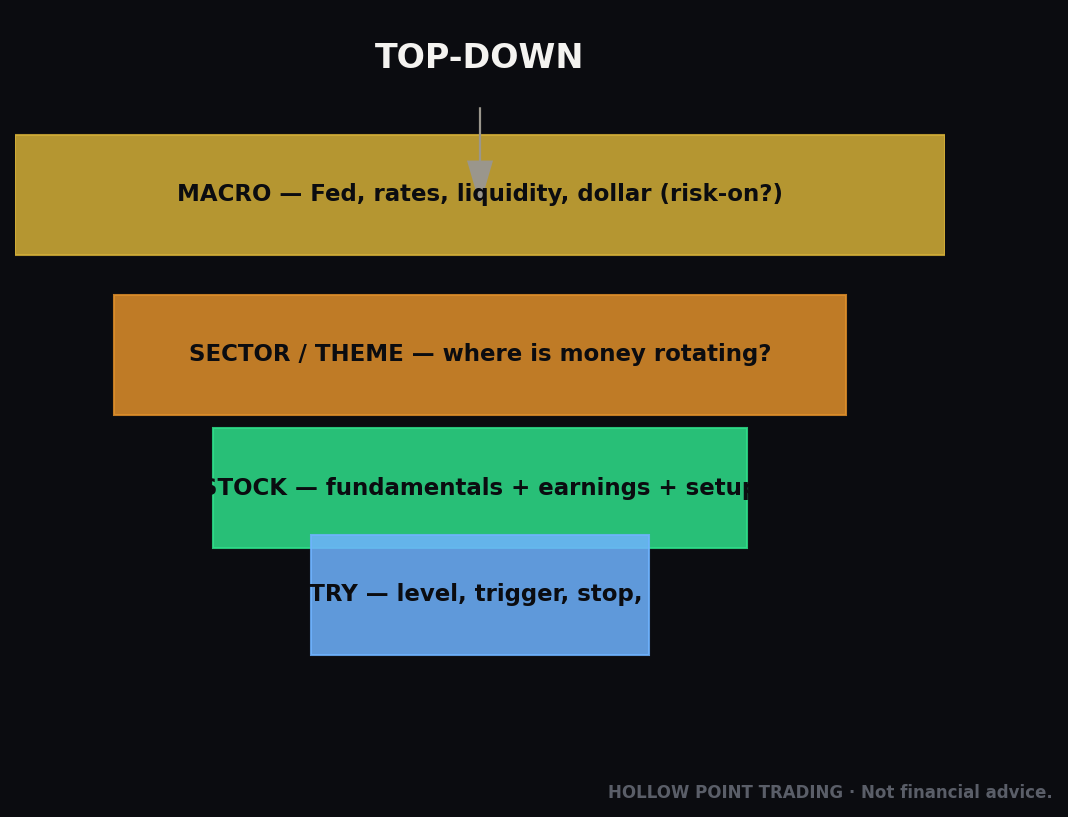
We think in a top-down order: macro → sector → stock. In plain terms: first, what's the whole market doing (macro) — up-trending, down-trending, or chopping sideways? Then, which slices of the market (sectors — tech, energy, banks) are strongest or weakest? Only then do you pick the specific thing to trade. A beginner version of this is simply: don't fight the big tide. If the whole market is falling all day, your long trades are swimming upstream. Trading with the larger trend is the easiest edge a beginner can hand themselves, and it costs nothing but patience.
The second pillar is discipline over prediction. Nobody — not us, not anyone — knows what the next candle will do. That sounds bleak until you realize it's freeing. You don't need to predict. You need to react to what price is actually doing, with a bracket that pays you 3-to-1 when you're right and costs you a small, fixed amount when you're wrong. Do that with discipline, over and over, and the math grinds in your favor. The trader who follows rules beats the genius who follows hunches, every year, without exception.
The third pillar is the one we opened with: protect capital first. You cannot trade tomorrow if you blew up today. The micro contract, the mandatory stop, the tiny per-trade risk, the sim account — these aren't beginner limitations. They're the same capital-protection instincts a twenty-year professional runs on, just sized for someone on their first day. You're not doing a watered-down version of trading. You're doing the real version, correctly, at a survivable size.
Your first trade is not supposed to make you rich. It's supposed to make you competent — to prove to yourself that you can build a bracket, place it, sit still, and let it finish. Competence first. Consistency second. Size, much later, only after the first two are boring. Boredom, in trading, is the sound of doing it right.
Your one-page cheat-sheet
Print this. Tape it next to your screen. Run down it before every single trade until it's muscle memory.
Before the trade
- [ ] Am I in the sim, or is this real money I can afford to lose?
- [ ] Am I trading ONE micro (MES/MNQ)? Not a full-size contract?
- [ ] What's the bigger market doing — am I trading with the tide, not against it?
- [ ] What's my read, in one sentence? (If I can't say it simply, I don't have one.)
Building the bracket
- [ ] Entry price: _______
- [ ] Stop-loss price: _______ (where I'm proven wrong)
- [ ] Target price: _______ (at least 3× my stop distance — the 1:3 rule)
- [ ] Dollar risk = stop distance in points × $5 (MES). Is it under my limit ($25–$50)?
Placing it
- [ ] Symbol, Quantity = 1, Direction, Limit entry, Stop, Target — all six filled.
- [ ] Stop and target both live the instant I'm filled? Confirmed.
Managing it
- [ ] Default action: DO NOTHING. Let the bracket work.
- [ ] Only ever move the stop toward less risk (to break-even), never further away.
- [ ] No adding contracts to a losing trade. No revenge trades.
After the trade
- [ ] Positions panel confirms I'm flat.
- [ ] Journaled: entry, stop, target, reason, result, and — Followed plan? Yes/No.
That's your first futures trade — the whole thing, top to bottom. It really is just six answers wrapped in a bracket and protected by a stop. Do it small, do it slow, do it the same way every time, and let the 1:3 math and the discipline do the heavy lifting your predictions never could.
The market will still be here Monday. Go build ten clean brackets in the sim first. Then come back and do one for real, one micro, forty dollars of risk, and feel what it's like to follow a plan from click to close. That feeling — calm, rule-bound, unbothered by the outcome — is what every professional is chasing. You can have it on day one, at micro size, for the price of paying attention.
Bound by rules, feared by trade.