
Most traders read a chart left to right. Open, high, low, close, next bar. That's time on the x-axis and price on the y-axis, and it answers exactly one question: what happened, and when? It's a diary. It's useful, but it's a record of the past dressed up to look like a plan for the future.
There's a sharper question for a trader hunting an entry: where did the most business actually get done? Not what time — what price. Because price is where buyers and sellers agree to transact, and the prices where they transacted the most heavily are the prices they will defend, revisit, and fight over again. Those levels have memory. They have inventory sitting on them. They have thousands of traders with a cost basis parked right there, and every one of those traders becomes a buyer or a seller the moment price comes back.
Volume & Market Profile flips the chart on its side and answers that question directly. This guide teaches you the entire toolkit — volume-by-price, the Point of Control, value areas, high- and low-volume nodes, naked POCs, composite versus session profiles, initial balance, developing value, anchored profiles, profile shapes — and, more importantly, how to actually trade the levels it hands you across trending, choppy, and high-volatility regimes. By the end you'll be able to open a chart cold on a Monday morning, drop a profile on it, and know within thirty seconds where the magnets are, where the trapdoors are, and where you have no business trading at all.
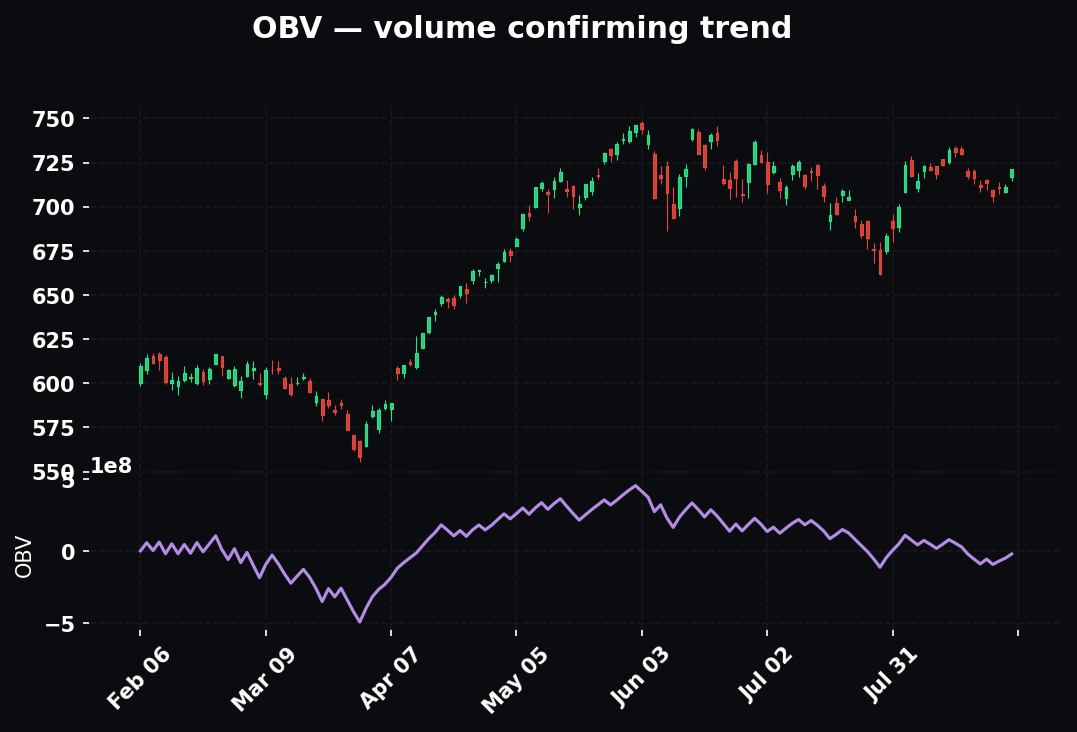
What It Actually Is: Volume-by-Time vs. Volume-by-Price
Open any chart and you already have volume — those bars along the bottom. That's volume-by-time: how many contracts or shares traded during each time bucket. A 5-minute bar shows you 5 minutes of volume. It's genuinely useful for spotting a spike, a climax, an exhaustion, a dry-up. But it tells you when volume happened, not at what price — and for finding levels, price is the only axis that matters.
Volume-by-price rotates that entire picture ninety degrees. Instead of stacking volume under each time bar, it stacks it sideways — a horizontal histogram running up and down the price axis, pinned to the right or left edge of your chart. Each horizontal bar says one thing: "This much total volume traded at this price, regardless of when it happened." A long bar means a price where a mountain of business changed hands. A short bar means a price the market sprinted through without doing much.
That's the whole conceptual leap, and it's bigger than it looks. Time-based volume is a timeline — a story told in order. Price-based volume is a map of acceptance — it strips the time axis out entirely and shows you only the prices the market decided were fair enough to trade heavily, and the prices it rejected and fled from. Two completely different days can produce the exact same volume profile, because the profile doesn't care about sequence. It cares about consensus.
Two Flavors: Volume Profile and TPO
You'll meet two versions of this tool in TradingView and on most platforms, and it's worth knowing the difference so you don't get confused reading other people's charts.
- Volume Profile uses actual traded volume — real contracts, real shares — at each price. This is the gold standard when you have clean, centralized volume data. Futures like NQ and ES trade on a single centralized exchange (CME), so their volume is honest and complete, which is exactly why profile work shines on them. This is the tool this guide leads with.
- TPO / Market Profile is the original, built by Peter Steidlmayer at the Chicago Board of Trade in the 1980s. Instead of volume it counts time. It slices the session into 30-minute periods, labels each with a letter (A, B, C, D…), and stacks a letter at every price that period touched. The result is a bell-curve-shaped distribution of letters. Where the most letters pile up is where the market spent the most time — a strong proxy for value.
Volume Profile answers "where did the most shares trade." TPO answers "where did the market spend the most time." In practice they usually point at nearly the same prices, because time-spent and volume-traded correlate tightly — the market lingers where it's doing business. Most modern traders lead with Volume Profile and borrow TPO vocabulary (like "initial balance," which we'll get to) as language. But TPO has one genuine edge worth knowing: on thin instruments or spot forex where real volume data is unreliable or fragmented across venues, TPO's time-count sidesteps the bad-volume problem entirely, because time is always measured cleanly. If you ever trade something without trustworthy centralized volume, reach for TPO.
Why the Distinction Matters in Practice
Beginners obsess over which flavor is "better." It's the wrong question. They agree far more than they disagree. The real skill is knowing that both are trying to locate the same thing — the price the auction blessed as fair — and using whichever the instrument's data supports. For NQ and ES, use Volume Profile. For a low-volume small-cap or a fragmented spot market, don't trust the volume; lean on TPO or price-action structure instead.
The Mechanism: Why Any Of This Works
Here's the part most tutorials skip entirely, and it's the part that turns the tool from a set of magic lines into something you actually understand. Why would a horizontal volume bar predict anything about the future?
Markets are an ongoing, never-ending auction. The entire purpose of an auction is to discover a price where the most buyers and sellers agree to transact — a fair price. When price reaches an area both sides consider fair, trade explodes: volume swells, price stalls, and the market rotates sideways, grinding out contracts. That heavy-volume area is the market's declaration of fair value. When price drifts to a level one side considers unfair — too expensive for buyers, too cheap for sellers — trade dries up and price rockets through, because nobody wants to transact there. That's the thin, fast, empty zone.
So a volume profile is quite literally a photograph of the auction's conclusions:
- Fat sections (high volume) = accepted, fair, agreed-upon prices. They act like magnets and like support/resistance, because the market has already proven, with real money, that it wants to do business there.
- Thin sections (low volume) = rejected, unfair, "get me out of here" prices. Price slices through them fast in both directions.
The predictive edge rests on one behavioral truth: the market remembers where it found value, and it tends to return to it. A price where thousands of contracts changed hands is a price where thousands of traders are carrying positions, cost bases, and unfinished business. Revisit that price and you reactivate every one of them. Longs who bought there and are now underwater want out at breakeven. Shorts who sold there and got squeezed want a second chance. New participants who missed the move want in "at a fair price." All of that latent order flow is sitting on the level, dormant, waiting for price to come back and wake it up. That's why these levels react. It isn't mysticism — it's inventory.
The Auction Never Stops — It Just Changes Location
One more layer, because it explains almost every profile behavior you'll ever see. An auction that finds fair value and trades heavily is complete at that price — the business got done. An auction that pokes a price and snaps away without trading did not complete — it's unfinished. Unfinished auctions nag at the market. This is the entire logic behind naked POCs, single prints, and poor highs and lows: the market has a documented tendency to return and finish what it started. Once you internalize "the market returns to complete unfinished business," half the profile playbook writes itself.
The Core Anatomy: POC, Value Area, VAH, VAL
Every profile — whether it covers one day or one year — has the same skeleton. Learn these four terms cold and you can read any profile on any instrument on any timeframe.
Point of Control (POC) — the single price with the most volume traded. The longest bar on the histogram. This is the market's most-agreed-upon price for that period, the fair-value fulcrum. On a chart it becomes the level everything rotates around. Treat it as the strongest magnet and the strongest pivot in the whole profile. If you could keep only one line off a profile, keep this one.
Value Area (VA) — the range of prices where 70% of the total volume traded. Why 70%? It comes straight from statistics: in a roughly normal (bell-curve) distribution, about 68–70% of the data falls within one standard deviation of the mean. Steidlmayer's insight was that price distributions behave similarly enough that the middle 70% of volume can define "value" — the zone the market considered fair. The outer 30% (roughly 15% on each tail) is the "extreme": prices that were tested but never really accepted. Some platforms let you change that 70% figure; leave it at 70 until you have a specific, tested reason not to. It's the standard for a reason, and consistency across your charts matters more than optimizing the number.
Value Area High (VAH) — the top edge of that 70% zone. The upper boundary of fair value. Above it, price is "expensive."
Value Area Low (VAL) — the bottom edge. The lower boundary of fair value. Below it, price is "cheap."
So a single profile hands you five reference prices: VAH, POC, and VAL as the core three, plus the session high and low as the outer extremes. Price above VAH is "expensive / above value." Below VAL is "cheap / below value." Between them, price is "in value" — balanced, choppy, low-edge, dangerous to initiate. That single distinction — in value vs. out of value — is one of the most useful reads in all of trading, and the entire playbook in this guide is built on top of it.
Developing Value: The Profile Is Alive Intraday
Here's a subtlety beginners miss and pros lean on constantly. During the trading day, the session profile isn't finished — it's developing. The POC, VAH, and VAL are recalculated on every bar as new volume prints. This "developing" profile is a live read on who's winning.
- A developing POC that keeps rising all session means value is migrating up — buyers are steadily paying higher prices and the market is accepting them. That's a bullish tell even before price makes new highs.
- A developing POC that keeps falling means value is migrating down — sellers are in control of the fair price itself, not just the extremes.
- A developing POC that sits flat in the middle while price swings around it means genuine balance — rotation, chop, a fade day.
Watching where value is building right now is often a cleaner read than watching price, because price is noisy and value is where the actual business is getting done. Value migration is the market voting with contracts instead of ticks.
High-Volume Nodes vs. Low-Volume Nodes: Magnets and Trapdoors
The POC is just the single biggest high-volume node. A real profile has several worth naming, and reading the whole ridge-line is where the tool earns its keep.
High-Volume Nodes (HVN) — Where the Market Settled
An HVN is a local peak in the profile — a price shelf where a lot of volume clustered. HVNs are areas of acceptance, and they do two jobs depending on where price is relative to them:
- Magnet — when price is away from an HVN, it tends to get pulled back toward it, because that's where the unfinished business and the heavy inventory live.
- Support/resistance — when price arrives at an HVN, it tends to stall and chop, because the heavy prior trade absorbs incoming orders like a sponge. Moves decelerate and frequently reverse inside HVNs. A strong trend that runs into a fat HVN from a higher timeframe is running into a wall of prior business, and it usually pauses there whether the trend "deserves" a pause or not.
Low-Volume Nodes (LVN) — Where the Market Fled
An LVN is a valley in the profile — a price where very little traded. This is rejected territory, and it does the exact opposite job:
- Fast zone — price rips through LVNs quickly. If you need a target, the far side of an LVN is an excellent one, because there's no volume inside it to slow price down. Price treats an LVN like a slide.
- Rejection line — an LVN is a natural border wall between two value areas. Price approaching an LVN from one side often rejects hard, because to cross it the market has to accept a price it previously fled from. But if it does cross and hold, it usually accelerates violently, because there's nothing to lean against until the next HVN.
The Practical Rule
You want your entries at the edges of HVNs and your targets on the far side of LVNs. You enter where the market will defend you and you aim at the empty air the market wants to travel through. An entry in the middle of an LVN is asking to get whipsawed on noise. A target set inside a fat HVN is asking to stall and give back your gains while price grinds sideways.
A useful mental image: the profile is a mountain range viewed from the side. HVNs are the plateaus where towns get built and people settle — stable, populated, defended. LVNs are the cliffs and ravines between them — nobody lives there, and price either falls through fast or bounces off the edge. You build your house on a plateau (enter at HVN edges) and you plan your journey across the ravine to the next plateau (target through LVNs at the next HVN).
Reading the Whole Shape: Bell, P, b, and Double-Distribution
The overall silhouette of a profile tells a story before you read a single number:
- Bell / D-shape (fat middle, thin tails) = a balanced, rotational, mean-reverting session. Value in the middle, fade the edges. This is the default "chop day" shape.
- P-shape (bulge at the top, thin tail below) = short-covering or a trend that ran up and then balanced at the highs. Often bullish-to-neutral; the thin tail below is a vacuum price can fall into if support breaks.
- b-shape (bulge at the bottom, thin tail above) = long liquidation or a sell-off that balanced at the lows. Often bearish-to-neutral; the thin tail above is a vacuum for a squeeze.
- Double-distribution (two fat nodes with an LVN between them) = a trend day that moved from one value area to a new one and built a fresh shelf. The LVN in the middle is the day's dividing line — the "point of no return." Price above it belongs to the upper distribution; below it belongs to the lower. That middle LVN becomes one of the most reliable intraday levels you'll ever trade against.
Learning to name the shape at a glance is a genuine pro skill. The shape tells you the character of the session, and the character tells you whether to fade or follow before you've drawn a single level.
Naked POCs: The Levels That Haven't Been Paid Yet
A naked POC (also called a virgin POC, or NPOC) is a prior session's Point of Control that price has not returned to touch since it formed. It's "naked" because it hasn't been "cleaned" — it hasn't been retested.
Why does anyone care? Because a POC represents the heaviest prior trade of its session, and unfinished auctions tend to get finished. There is a strong, well-documented empirical tendency for price to eventually return to a naked POC and tag it. So a naked POC sitting above or below current price is a high-odds target and a likely reaction point — a magnet with a track record.
How to Use Them
- Mark the POC of each session. When later sessions' ranges never overlap it, that POC stays naked — leave the line on your chart.
- Naked POCs above price are upside magnets and targets. Naked POCs below price are downside magnets. When price is drifting with no obvious level in front of it, the nearest naked POC is very often exactly where it's headed. It's the answer to "where does this go?" when nothing else is nearby.
- When price finally reaches a naked POC, watch for a reaction — a bounce, a stall, a rejection, a pause. Once tagged, the level is "filled" and loses most of its magnetic pull. Erase it, or at least demote it.
Why Naked POCs Are the Cleanest Tool in the Kit
Naked POCs are one of the highest signal-to-noise tools in this entire kit precisely because they're binary: a POC is either untouched or touched. There's no judgment call, no "is this a real level or am I fooling myself." Either price has been back or it hasn't. That objectivity is rare in technical analysis and worth exploiting. Keep a running list of the last one to two weeks of naked POCs stacked above and below the market, and you'll always have an objective, high-odds target inventory ready — no drawing, no debate.
One refinement the pros use: not all naked POCs are equal. A naked POC left behind by a high-volume session (a big trend day, an earnings day, an FOMC day) is a heavier magnet than one from a sleepy holiday session. Weight your naked POCs by the volume of the day that made them.
Composite vs. Session Profiles: Zoom Level Matters
The same tool at different zoom levels answers different questions. You need both, and you need to know which one is talking at any given moment.
Session (Daily) Profile
One profile per trading day. Answers "where was value today, and where is it right now?" This is your intraday map: today's POC, VAH, VAL, plus yesterday's for reference. Day traders and scalpers live here. Session profiles are noisy but responsive — they tell you the current, live state of the auction and update as it develops.
Composite Profile
One profile stretched across many days, weeks, or months, merging all that volume into a single distribution. Answers "where is major, structural value?" A composite over the last three months shows you the big shelves and voids that swing traders and institutions actually care about. These levels are heavier and react harder because far more volume built them — a composite HVN is a decision made by three months of participants, not one morning of them.
The Pro Move: Stack the Timeframes
The professional approach is to stack the profiles, exactly the way HPT stacks EMAs 12/22/55 for trend. The composite gives you the big-picture bias and the major structural levels — the equivalent of the daily 55 EMA telling you which way the river flows. The session profile gives you the tactical entry — where to actually get in. When today's session VAL lines up with a major composite HVN, that's a dramatically stronger level than either one alone, because the intraday auction and the multi-month auction agree on the same fair price.
Timeframe-weighted confluence isn't just an EMA idea — it's how you weight every level in this kit. The composite level outranks the session level when they disagree. The highest-conviction trades of your career will come when the two agree — when today's edge lands precisely on a wall that took months to build.
A three-tier structure many pros run:
- Composite (1–3 months) — bias and structural walls. Rarely changes.
- Weekly or multi-day profile — the intermediate map, the swing-trade levels.
- Session profile — the tactical, developing, live entry map.
Read them top-down. The composite says where you are. The session says where you act.
Initial Balance: The First Hour Sets the Table
Initial Balance (IB) is the price range established in the first hour of the session — traditionally the first two 30-minute periods (the "A" and "B" periods in TPO language). The IB high and IB low bracket where the opening auction found provisional agreement before the full cast of the day's participants showed up.
Why it matters: the first hour is dominated by overnight-position adjustment and the day's earliest, often strongest, conviction — the traders who came in with a plan. That range becomes a reference frame for the entire rest of the session.
IB Extension vs. IB Holding
- IB extension — when price breaks above IB high or below IB low later in the day, it signals the auction is exploring new territory, often the start of a trend day. Range extension up means buyers took control after the opening balance; the day is more likely to expand and close near its highs. Range extension down is the mirror image.
- IB holding — when price stays inside the IB range all day, you have a balance / rotation day: fade the edges, don't chase the middle. A large share of sessions respect their IB, which makes it a genuinely useful filter for the single most valuable question you can ask at 9:30 in the morning: trend or chop today?
IB and Day-Type Odds
Seasoned profile traders track roughly how the day tends to resolve based on IB behavior:
- A wide IB (big first-hour range) means a lot of the day's expected range may already be spent — extension is less likely, and you should lean toward fading. The market front-loaded its move.
- A narrow IB (tight, coiled first hour) means the range is still stored up — an extension out of a narrow IB has more room to run and more often becomes a full trend day. Coiled springs release.
IB for NQ Specifically
For NQ, the IB from the cash-open first hour (8:30–9:30 CT for the RTH session) is a level worth marking every single morning. A clean break and hold above IB high after a quiet, narrow open is one of the cleaner "today wants to trend up" tells you'll find — narrow IB plus extension plus opening in or above value is a trend-day trifecta. It pairs directly with the 7:45 premarket read: your premarket bias plus the IB behavior gives you a two-factor confirmation before you risk a dollar.
Anchored Volume Profiles: Profiling the Move That Matters
A standard session profile always starts at the session open — the clock decides your anchor. An Anchored Volume Profile (AVP) lets you choose the start point. You "anchor" it to a specific bar and it builds the profile forward from there, ignoring everything before. This is where the tool goes from useful to surgical, and it's the workhorse for serious reads.
Anchor to the events that actually created the current structure:
Anchor to a Major Swing Low or High
Profile the entire leg up (or down) from the pivot that started it. The POC of that leg is the fairest price of the whole move, and it's very often exactly where a pullback finds support. If NQ ran from 19,800 to 20,600, anchor at the 19,800 low: the leg's POC — say 20,150 — becomes your buy-the-dip level with a real volumetric reason behind it, not a guess. When price pulls back to 20,150, it's not pulling back to a random Fibonacci line; it's pulling back to the price where the most contracts of the entire rally changed hands.
Anchor to a Breakout Bar or a Gap
Profile from the exact moment the market changed character. Everything before the breakout is the old regime and its volume is stale. The anchored profile shows you where value has built since the shift — the levels that belong to the current move, uncontaminated by the range that preceded it.
Anchor to an Earnings Bar or a News Catalyst
Profile only the price action that reflects the new information. Pre-catalyst volume is priced on old assumptions; post-catalyst volume is the market repricing reality in real time. On a stock that gapped on earnings, an AVP anchored to the earnings bar tells you where the new fair value is being built — which is the only value that matters now.
Anchor to the Yearly, Quarterly, or Monthly Open
The composite POC since the year began is a genuine line-in-the-sand for institutional bias. Big money thinks in quarters and years. An AVP from January 1st gives you the single price that best summarizes "fair value for the year so far" — cross it and the whole year's tone shifts.
Why AVP Is the HPT Workhorse
An anchored profile turns "I think this leg has support somewhere down here" into "the POC of this exact leg is 20,150, and that's my level." It replaces a feeling with a number the market itself printed. That is the whole ethos — the levels do the work, you just have to anchor to the right event and read what it hands you. The skill in AVP isn't the tool; it's choosing the anchor. Anchor to the bar where something changed, and the profile forward from there is the map of the world as it exists now.
Trading Acceptance vs. Rejection: The Only Two Outcomes
Every level in this kit resolves one of two ways, and your entire edge lives in reading which one is happening. When price reaches a profile level — POC, VAH, VAL, an HVN edge, a naked POC, a composite wall — it either gets accepted (the market agrees this price is fair, trades there, absorbs orders, and holds) or rejected (the market disagrees and shoves price back out).
What Rejection Looks Like
- Price pokes the level and snaps back within a bar or three.
- Long wicks pointing into the level (a wick up into VAH, a wick down into VAL).
- A volume spike on the touch that immediately dies.
- Failure to close beyond the level on the timeframe you're trading.
- Price re-entering the prior value area after poking out.
Rejection at a value-area edge is a fade signal — trade back toward the POC.
What Acceptance Looks Like
- Price trades through the level and stays there.
- Multiple closes beyond it, not just a wick.
- Volume building on the new side, not drying up.
- A fresh little shelf — a mini-HVN — forming past the level.
- Time. Acceptance takes time; a genuine breakout spends minutes holding the new ground, not seconds.
Acceptance is a breakout / continuation signal — the auction has expanded, and you trade in the direction of the break, targeting the next node.
The Highest-Odds Pattern: The Value-Area Edge
The single most reliable day-trading pattern built on all of this is the value-area reclaim / rejection at the edge:
- Price is inside value and drifts up to VAH. If it rejects (wick, snap-back, no acceptance, re-enters value), you short back toward POC, then VAL. Stop just above VAH. Textbook balance-day fade.
- If instead price accepts above VAH — closes above it, builds a shelf, volume follows — you flip your entire thesis. That's range extension: go long, target the next HVN or naked POC above.
Same level. Two opposite trades. Your job is not to predict which one will happen — it's to wait for the market to tell you which is happening, then act on the information. That waiting is the entire discipline. Traders who lose money at the value-area edge lose because they picked a side before the auction voted. Traders who make money let the wick or the shelf print first, then take the trade the market already confirmed.
The 80% Rule
One classic edge worth knowing: if price opens outside yesterday's value area and then trades back into it and spends two consecutive 30-minute periods inside, there's a strong tendency (the old floor-trader "80% rule") for price to rotate all the way across the value area to the opposite edge. Re-acceptance into value after a failed excursion outside it is a powerful mean-reversion setup — the market tried to leave, failed, and now has to fill the whole area back in.
Worked Example 1: The Balance-Day Fade (NQ)
Say NQ builds yesterday's profile like this: POC 20,150, VAH 20,240, VAL 20,060. Overnight is quiet and price opens today at 20,180 — right inside yesterday's value. The first hour prints an IB of 20,150–20,225. No IB extension; price is rotating; the developing POC is sitting flat near 20,160. Every signal says balance day until proven otherwise.
Around 10:15 CT price grinds up to 20,238 — kissing yesterday's VAH and the top of the IB, two independent levels stacked at the same price. It prints a 5-minute bar with a long upper wick and closes back down at 20,220, re-entering value. No acceptance above VAH; volume spiked on the poke and immediately faded. That's textbook rejection.
The trade: short 20,232 into the rejection, stop 20,252 (above the VAH + IB-high shelf — 20 points of risk). First target the developing POC around 20,175; runner target yesterday's VAL at 20,060. From 20,232 down to 20,060 is 172 points against 20 points of risk — well beyond the 1:3 R/R minimum, so the trade clears the filter before you even take it. Price rotates down through the POC, pauses to let the POC magnet do its thing, then flushes to VAL by early afternoon where it finds the lower edge of value and bounces. The levels did the work. The discipline — waiting for the wick, not shorting the first tap of VAH — is what actually banked it. A trader who shorted the first touch at 20,238 with no confirmation got stopped on the wick that a patient trader used as their signal.
Worked Example 2: The Range-Extension Trend Day
Same levels, completely different open. Today NQ gaps up and opens at 20,250 — above yesterday's VAH of 20,240, already out of value to the upside before the bell. The first hour is strong; the IB prints a narrow 20,250–20,340, and critically, the 9:35 CT bar extends above IB high and holds, building a fresh shelf at 20,345–20,360. Volume is building on the new highs, not fading. The developing POC is rising all morning.
Now the read inverts completely. We're above value and getting IB extension up from a narrow IB — a trend-day signature stacked three deep. You do not fade this. Fading here is how accounts die. Instead you wait for the first pullback into the new acceptance shelf: price dips to 20,348, holds the IB-high-turned-support, and prints a small higher low. You long 20,352, stop 20,332 below the shelf (20 points of risk). Target? Look up for empty air. There's an LVN from 20,400–20,470 (a thin zone left by a fast prior move) and a naked POC at 20,510 from three sessions ago. Price rips through the LVN — no volume inside it to slow the move — and tags the naked POC at 20,510 before stalling into it. 20,352 to 20,510 on 20 points of risk: better than 1:7. The LVN was the runway; the naked POC was the destination. Both were on the chart before the trade was ever taken.
Worked Example 3: The Failed Breakout / Trap (High-Vol Regime)
This one shows what happens when acceptance fails, because knowing the trap saves more money than any winning setup. It's a high-volatility session — a CPI print morning. NQ spikes up through yesterday's VAH at 20,240 on the number, tags 20,290, and everyone watching a naive breakout system goes long. But watch the acceptance: price never builds a shelf above VAH. The 20,290 high is a single fast spike, volume dries up above 20,250 almost immediately, and within two 5-minute bars price is back below VAH at 20,225 — re-entering value. That's a failed breakout, and re-entry into value after a failed excursion is a screaming reversal signal (the 80% rule in action).
The trade: the breakout buyers are now trapped above value with losing positions. Short 20,222 on the re-entry, stop 20,255 above the failed high. Because trapped longs must puke their positions, the move down is fast and one-sided — their stops become your fuel. Target the developing POC, then VAL. In a high-vol regime these trapped-trader flushes are the highest-expectancy trades on the board, because the losers' forced exits do your work for you. The lesson: a poke is not a breakout. Acceptance requires time and volume on the new side. When it's missing, the breakout is bait.
Market Regimes: The Same Profile, Read Three Different Ways
The single most common way traders blow up with this tool is applying a balance-day playbook on a trend day, or vice versa. The profile means different things in different regimes. You must diagnose the regime first.
Trending Regime
In a trend, value migrates. Each day's value area builds higher (uptrend) or lower (downtrend) than the last — this is "one-timeframing." Profiles print P-shapes (up) or b-shapes (down) and double-distributions. The naive fade — shorting VAH — gets run over daily.
How to trade it: trade with the migration. Buy pullbacks to the developing VAL or POC in an uptrend; sell rallies to developing VAH/POC in a downtrend. Value-area edges become continuation entries, not fade entries. Naked POCs and LVNs in the direction of the trend are your targets, and price reaches them faster than it "should." The prior-day POC becomes support-turned-resistance depending on trend direction. Above all: in a trend, the edge you fade in chop becomes the edge you buy in trend.
Choppy / Balanced Regime
In chop, value is stationary. The POC parks in the middle, day after day builds bell-shaped profiles around roughly the same prices, and value areas overlap heavily from session to session. This is the fade regime.
How to trade it: fade the edges back to the POC. Short VAH rejections, buy VAL bounces, take profit at the POC. Keep targets modest — the POC, not the far extreme. The whole day is a rotation, so trading to the middle is trading with the market's nature. The killer here is over-staying: in chop, a runner that "should" continue instead reverses at the opposite edge and gives it all back. Bank the rotation.
High-Volatility Regime
In high-vol (CPI, FOMC, earnings, geopolitical shocks), value is being violently redrawn. Profiles are thin and stretched, LVNs are everywhere, and levels get sliced through — but they still matter, they just need wider stops and confirmation.
How to trade it: widen stops, size down to keep dollar risk constant, and demand clear acceptance/rejection before acting — the noise generates false pokes constantly. Failed breakouts and trapped-trader flushes (Example 3) are the bread and butter. Naked POCs still get tagged, often faster and harder. The discipline that matters most here is not trading the first spike — let the initial volatility burn off, let a fresh shelf build, then trade the level that survives. High-vol punishes the impatient more than any other regime.
Diagnosing the Regime in 15 Seconds
Ask three questions every morning:
- Is value migrating or stationary across the last 3–5 sessions? (Migrating = trend; stationary = chop.)
- Did we open in, above, or below yesterday's value? (In value = lean balance; out of value = lean trend/directional.)
- Is the IB narrow or wide, extending or holding? (Narrow + extending = trend; wide + holding = balance.)
Three trend answers = trade continuation and follow breaks. Three balance answers = fade edges. Mixed = trade smaller and let the IB resolve the tie.
Multi-Timeframe Treatment: Top-Down Profile Reading
Profiles nest inside each other, and the pro reads them top-down, exactly like a top-down trend read.
- Monthly / quarterly composite — the tectonic plates. Where is structural value for the whole regime? This sets bias and the heaviest walls. You rarely trade off these directly, but they tell you which direction has the wind at its back.
- Weekly / multi-day composite — the swing map. The HVNs and LVNs here are where multi-day moves pause and turn. Swing entries and targets live here.
- Daily / session — the tactical map. Today's developing value, today's edges, today's IB. This is where you actually pull the trigger.
The rule of alignment: when the timeframes agree, conviction is highest; when they conflict, the higher timeframe wins and you trade smaller or stand aside. A session VAL that sits on a weekly HVN that sits on the monthly composite POC is not three levels — it's one fortress, and price bounces off fortresses hard. Conversely, a session VAH with nothing behind it on higher timeframes is a weak level that breaks easily; don't bet the farm fading it.
This is the same logic as HPT's timeframe-weighted confluence for EMAs and structure, applied to volume. The weight of a level scales with the timeframe that built it.
Building Confluence: Stacking the Profile With Everything Else
Profile levels are strongest when they don't stand alone. A lone profile line is a suggestion. A profile line with three other tools pointing at it is a setup. Layer them deliberately.
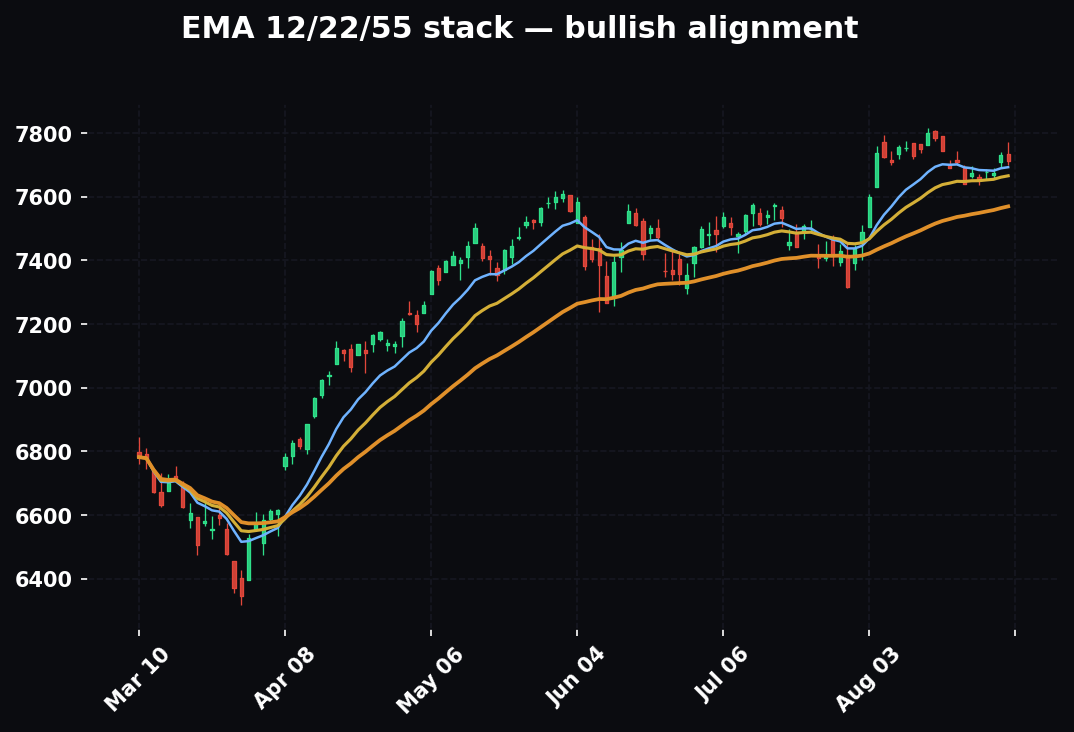
With EMAs (12/22/55)
When the daily 55 EMA — the bias tell — sits right on a composite HVN, that's a fortress level. The trend-following crowd defends the EMA and the volume crowd defends the HVN, and they're defending the same price. Trade with the 55's direction and use the profile edge for a precise entry. When the 55 EMA and a naked POC are converging ahead of price, that convergence is very often exactly where the next swing turns.
With VWAP
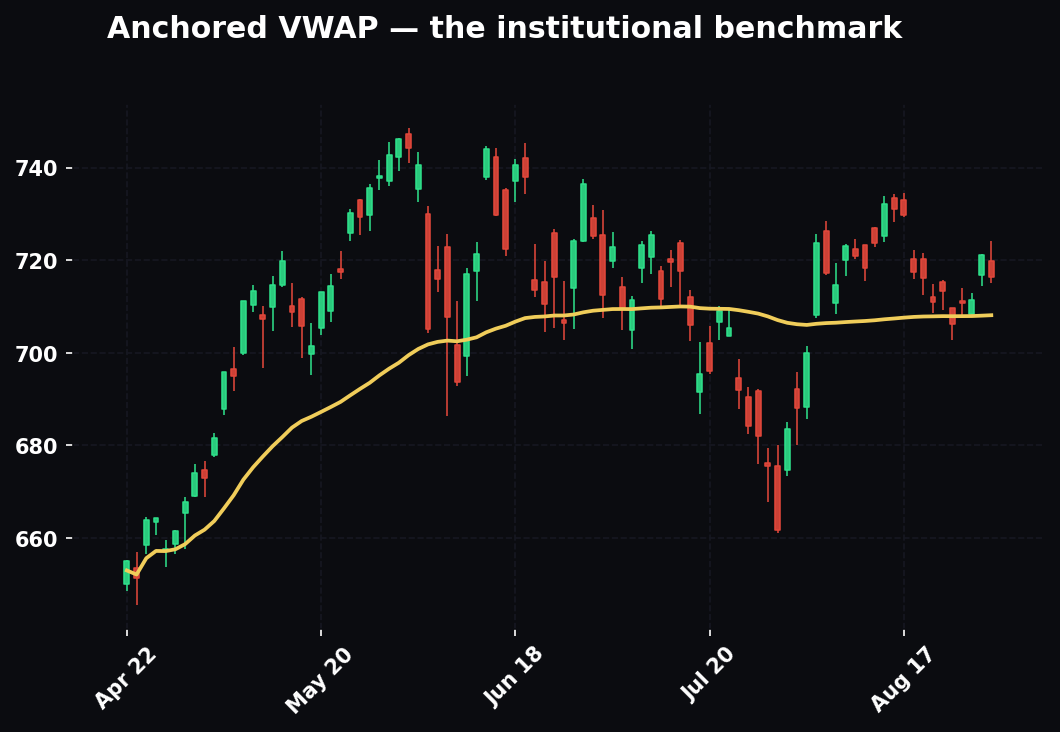
VWAP is itself a volume-weighted fair-value line — it's a cousin of the POC computed a different way. When VWAP and the session POC converge, you've got the two strongest mean-reversion magnets on the chart stacked on one price: an extremely high-odds bounce/rotation zone. When they diverge, the gap between them often gets closed — price is drawn to split the difference. VWAP bands (1st and 2nd standard deviation) landing on value-area edges is another common, powerful stack.
With Fibonacci
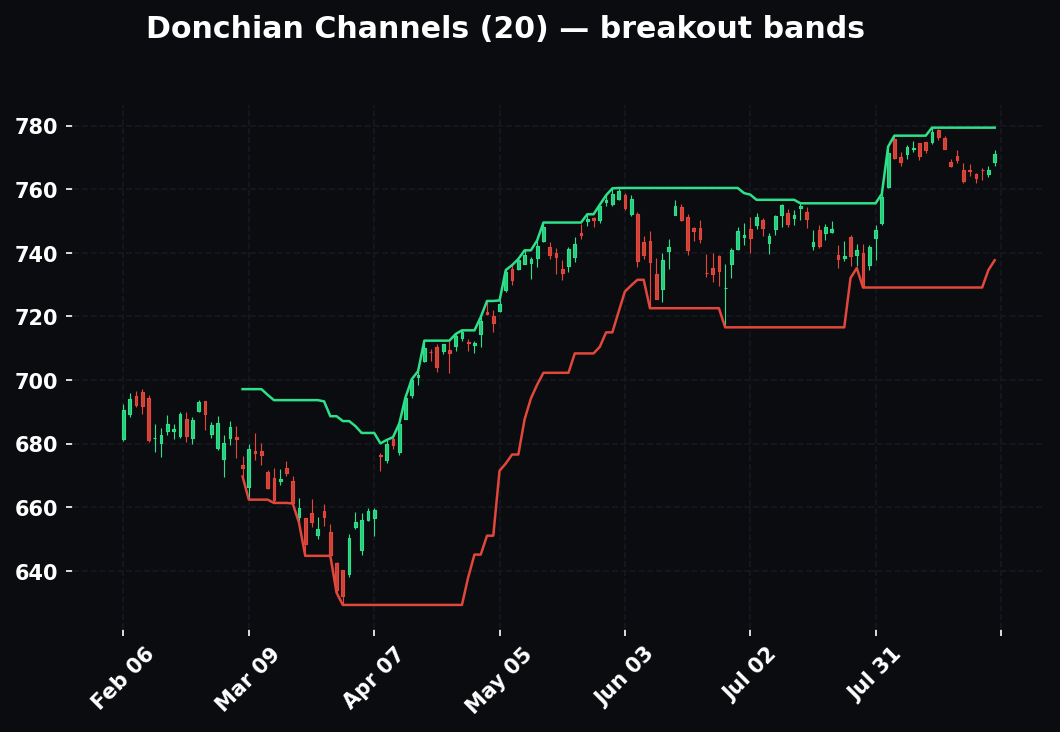
When the golden pocket (0.618–0.65) of a leg lands inside an HVN or right on the leg's anchored POC, the fib stops being a drawn line and becomes a volume-confirmed level. A fib with no volume behind it is a hope; a fib sitting on the anchored POC of the exact leg it measures is a top-tier entry with two independent methods agreeing. This is one of the cleanest confluence stacks in the entire kit.
With Prior-Day Levels and Round Numbers
Yesterday's VAH/VAL, the overnight (Globex) high and low, the prior-day high and low, and psychological round numbers (20,000, 20,500) that coincide with profile nodes all multiply the reaction. Round numbers matter because humans place orders at them; when a round number also sits on an HVN, you get behavioral and volumetric memory on the same price.
With Options Positioning (GEX)
When a call wall or put wall lines up with a profile HVN or naked POC, dealer hedging flow and volumetric memory pull in the same direction. Gamma pins and volume magnets stacked is about as strong a "price gravitates here and gets stuck" signal as the market gives. A put wall on a composite VAL is a floor with two independent reasons to hold; a call wall on a naked POC above is a target with a magnet and a dealer-hedging ceiling waiting for it.
The Confluence Rule
One level is a level. Three stacked levels is a setup. Weight them by timeframe — the composite and daily levels outrank the intraday ones when they conflict — and never manufacture confluence that isn't there. Two genuine, independent tools agreeing beats five flavors of the same tool dressed up to look like a crowd. A weak stack gets called weak.
How the Pros Use It Differently From Beginners
The tool is the same on both screens. The reading is night and day.
Beginners treat levels as lines. Pros treat them as zones with context. A beginner sets a limit order at the POC to the tick and gets wicked out. A pro treats the POC as a zone, waits for a reaction inside it, and enters on confirmation.
Beginners read one profile. Pros read the stack. A beginner drops today's session profile and calls it a day. A pro reads the composite for bias, the weekly for the swing, and the session for the entry — and only trades where they agree.
Beginners predict. Pros react. A beginner decides at 9:15 that "VAH will reject" and shorts the first touch. A pro has both plans loaded — reject = fade, accept = follow — and lets the auction vote before choosing. The beginner needs to be right about the future; the pro only needs to read the present.
Beginners fade everything. Pros diagnose the regime first. The value-area fade is a balance-day tool, and a beginner who learned it fades right into a trend day and gets run over for a week. A pro checks value migration and IB behavior before deciding whether the edge is a fade or a launchpad.
Beginners see a small volume bar and think "support." Pros see an LVN and think "trapdoor." This single inversion — understanding that low volume means rejection, not quiet accumulation — separates people who lean on LVNs (and get flushed) from people who target through them.
Beginners obsess over the tool's settings. Pros obsess over the anchor and the context. Which row size, which value-area percentage, volume vs. TPO — beginners burn hours here. Pros know the defaults are fine and spend their energy choosing what to profile: the right leg, the right catalyst, the right composite window. The anchor is the analysis.
Beginners take the level in isolation. Pros stack confluence and apply the R/R filter. A pro won't touch a beautiful level if the nearest logical target only offers 1:2 — the math has to clear before the setup is real. Beginners fall in love with the level and ignore the geometry.
Beginners erase nothing and drown in lines. Pros keep the chart clean. A naked POC that got tagged is gone. A retested-five-times level is spent and comes off. A pro's chart shows only live, unpaid levels; a beginner's chart is a spiderweb of dead lines they can no longer prioritize.
Beginners watch price. Pros watch developing value. Price is noise. Where value is building right now is signal. A pro can be short while price ticks up, because the developing POC is falling and telling them the up-tick is a retail head-fake.
The Common Mistakes
1. Trading the POC as a hard line. The POC is a zone and a magnet, not a laser to the tick. Price wicks through it constantly. Set your entry as a reaction zone, wait for confirmation, and never put a limit order at the exact POC price expecting a clean bounce.
2. Fading a trend day. The value-area fade is a balance-day tool. On a trend day (IB extension, opening out of value, value migrating, one-timeframing higher) fading the VAH gets you run over repeatedly until your account is gone. Diagnose the day type first: in value or out? IB holding or extending? Value stationary or migrating?
3. Using the wrong lookback / anchor. A composite profile over an arbitrary window is garbage in, garbage out. Anchor deliberately — to a swing, a breakout, a catalyst, a session — not to a mindless "last 100 days." The anchor is the analysis, and a lazy anchor produces meaningless levels that will still look official on your chart.
4. Confusing low-volume with support. An LVN is not a shelf to lean on — it's a trapdoor. Traders see a small bar and think "not much selling here, safe to buy," when it actually means "price wants nothing to do with this zone and will fall through it." Lean on HVN edges; aim through LVNs. Getting this backwards is the most expensive beginner error in the whole kit.
5. Ignoring whether the level is fresh. A naked POC is potent; a POC that's already been retested five times is spent and thin on order flow. Once a level is cleaned, its magnetic pull is mostly discharged — drop it or heavily demote it. Trading a five-times-tested level as if it's fresh is trading a memory that's already been erased.
6. Reading volume-by-time when you need volume-by-price. A spike on the bottom volume bars tells you a lot happened at some time. It tells you nothing about at what price that activity will matter next. For finding and trading levels, you need the horizontal profile. Confusing the two axes means you're answering "when" when the question was "where."
7. No R/R filter. A perfect, gorgeous, three-tool-confluence level with 40 points of risk and only 30 points to the nearest logical target is still a bad trade. Every profile setup gets measured against the 1:3 R/R minimum before it's allowed to exist. The level's beauty is irrelevant if the geometry doesn't pay.
8. Mistaking a poke for acceptance (or a wick for rejection too early). Acceptance requires time and volume on the new side — multiple closes, a building shelf. A single fast spike beyond a level is often a trap, not a breakout (see Example 3). Conversely, calling rejection on the very first tick back is jumping the gun. Let the level resolve. The information you're waiting for is worth the two bars it costs you.
9. Forcing trades in the middle of value. The middle of the value area is the chop zone — no edge, no clear level, maximum noise. Beginners initiate there out of boredom or FOMC. Pros only initiate at the edges — VAH, VAL, HVN boundaries, naked POCs. If price is dead center in value with nothing nearby, the correct trade is no trade.
10. Over-relying on the profile in isolation. The profile is a map, not a crystal ball. A level with no confluence — no EMA, no VWAP, no fib, no GEX, no structure — is a weak level. Traders who treat a lone POC as gospel get chopped up. Stack it or size down.
11. Not accounting for the session type (RTH vs. full session). A profile built on 24-hour Globex volume looks different from one built on the RTH (cash) session only. Overnight volume is thinner and can distort the POC. Know which session your profile covers and be consistent — mixing them silently produces levels that don't line up with anything.
12. Refusing to update the read intraday. The morning's balance-day thesis can be invalidated by an 11 a.m. IB extension. The profile is developing — value migrates, the POC moves, a balance day becomes a trend day. A pro re-reads the developing profile all day; a beginner locks in the 9:30 thesis and rides it into a wall. The map redraws itself; keep looking at it.
The Monday-Morning Playbook
- Set the frame. Drop a composite profile over the last 1–3 months. Mark the composite POC, VAH, VAL, the big HVNs, and any obvious LVN voids. This is your structural map and your bias. Everything else is tactics inside this frame.
- Add the intermediate map. Drop a weekly or multi-day profile. Note where its levels agree with the composite — those agreements are your heaviest walls.
- Add yesterday. Drop the prior session profile. Mark yesterday's POC/VAH/VAL and every naked POC from the last week or two that's still untouched, weighted by the volume of the day that made each one.
- Locate price. In value or out of value? Above or below the composite POC? Is value migrating or stationary across the last few sessions? The nearest naked POC above and below are your first two magnets and targets.
- Diagnose the regime. Trend, chop, or high-vol? Use the three-question test. This decides whether you're fading edges or following breaks before the bell.
- Wait for the IB. Let the first hour build. Narrow IB + extension = lean trend, trade with breaks. Wide IB + holding = lean balance, fade the edges back to POC. Let the market resolve the tie if the signals are mixed.
- Trade the edges, not the middle. Enter on acceptance/rejection at a value-area edge, an HVN boundary, or a naked-POC tag. Never initiate in the dead center of value — that's the chop zone with no edge.
- Target the voids and the naked levels. Aim through LVNs at the next HVN or naked POC. That's the empty air price wants to travel through and the destination it's magnetically drawn to.
- Stack confluence, weight by timeframe, apply 1:3. Take it only when the level is confirmed by a second and third tool and the math clears the 1:3 minimum. Composite/daily levels outrank intraday ones when they conflict.
- Read the reaction, then act — and keep reading. Acceptance = go with it. Rejection = fade it. Let the market vote first, and keep re-reading the developing profile all day. The thesis is a hypothesis, not a vow.
FAQ
Which timeframe should I build the volume profile on? Build it on the event, not a timeframe. Use a composite over 1–3 months for structural bias, a weekly or multi-day profile for swings, and the session profile for intraday entries. For anchored profiles, anchor to the swing, breakout, or catalyst that created the current structure — the underlying chart timeframe barely matters; the anchor does.
Volume Profile or TPO — which should I use? Lead with Volume Profile on instruments with clean centralized volume (NQ, ES, most liquid futures and large-cap stocks). Use TPO when volume data is unreliable or fragmented (thin small-caps, spot forex). They usually point at the same levels, so it's rarely worth agonizing over.
How is the Point of Control different from VWAP? Both are fair-value measures, computed differently. The POC is the single most-traded price over a chosen period (a mode). VWAP is the volume-weighted average price, anchored to a start (a mean). They often sit near each other; when they converge you have a double-strength magnet, and when they diverge price tends to close the gap.
Do naked POCs always get filled? No — "strong tendency" is not "always." Most get tagged eventually, but some never do, especially if a regime shift permanently repriced the instrument (a gap that never fills). Treat a naked POC as a high-odds magnet and target, not a guarantee, and always pair it with an R/R filter and a stop.
Should I use the RTH session or the full 24-hour session for the profile? Be deliberate and consistent. RTH-only profiles reflect where the "real" institutional cash-session business happened and often produce cleaner levels for day trading. Full-session profiles include overnight, which can distort the POC on thin Globex volume but capture levels that overnight traders defend. Many pros run RTH for the primary read and glance at the full session for overnight levels. Just don't unknowingly mix them.
What row size or value-area percentage should I set? Leave the value area at 70% and use the platform's default row/tick size unless you have a specific tested reason to change it. Beginners burn hours optimizing settings that barely move the levels. Consistency across your charts matters far more than the exact number.
Can I use volume profile on stocks, or just futures? Both. It works great on liquid large-caps with clean volume. It gets unreliable on thin small-caps where volume data is noisy and a single block trade can distort a node — there, lean on TPO or price structure instead. Crypto works well on major pairs on a single exchange; be careful aggregating across venues.
How do I know if it's a trend day or a balance day early enough to matter? Use the three-question test at the open: Is value migrating or stationary over the last few sessions? Did we open in, above, or below yesterday's value? Is the IB narrow/extending or wide/holding? Three trend answers = trend day, follow breaks. Three balance answers = fade edges. The IB usually confirms it by 9:30–10:00; let it resolve mixed signals.
What's the difference between an HVN and support/resistance from a horizontal line? A horizontal S/R line marks a price that reacted. An HVN marks a price where the most business was done. They often coincide, but the HVN carries the extra information of how much inventory is parked there — and heavy inventory reacts harder. An HVN is S/R with a volume receipt attached.
Why did price slice straight through my POC without reacting at all? Usually one of three reasons: the POC was already retested and spent (not fresh), it was built on the wrong session or a bad anchor, or the market is in a strong trend/high-vol regime where it's blowing through mean-reversion levels on its way to a new value area. A POC in a trend is a speed bump, not a wall — and a stale POC is barely even that.
Quick-Reference Cheat-Sheet
The core anatomy
- Volume-by-time = when volume happened (bottom bars). Volume-by-price = at what price (side histogram). For levels, always use price.
- POC — most-traded price; strongest magnet and pivot. Trade it as a zone, not a line.
- Value Area (70%) — where 70% of volume traded. VAH = top, VAL = bottom. In-value = chop; out-of-value = trend/edge.
- Developing value — the profile is live intraday. Rising developing POC = bullish; falling = bearish; flat = balance.
The nodes
- HVN — fat node = acceptance = magnet + support/resistance. Enter at its edges.
- LVN — thin node = rejection = fast zone. Target through it; expect rejection at it. Never lean on it as support — it's a trapdoor.
- Naked POC — untouched prior POC = high-odds magnet/target. Weight by the volume of the day that made it. Fires once, then erase it.
Shapes
- Bell/D = balance, fade the edges. P = short-cover/top-balance, thin tail below is a vacuum. b = liquidation/bottom-balance, thin tail above is a vacuum. Double-distribution = trend day; the middle LVN is the point of no return.
Zoom and time
- Session profile = today's tactical map. Composite = structural bias and major walls. Stack them; composite outranks the session.
- Multi-timeframe — monthly (bias) → weekly (swing) → session (entry). Aligned levels = fortress; conflicting = higher timeframe wins, trade smaller.
- Initial Balance — first hour's range. Narrow + extension = trend day (go with breaks). Wide + holding = balance day (fade edges).
- Anchored VP — profile from a chosen swing/breakout/catalyst; its POC = the fairest price of that move = your dip-buy/rally-sell level. The anchor is the analysis.
Trading it
- Acceptance (closes beyond, builds a shelf, volume follows, takes time) = continuation. Rejection (wick, snap-back, no hold, re-enters value) = fade.
- Value-area edge = the highest-odds pattern: reject = fade to POC; accept = follow to next node. Wait for the vote; don't predict it.
- 80% rule — open outside value, trade back in and hold two periods = high odds of rotating to the opposite edge.
- Failed breakout — poke beyond a level with no acceptance, then re-entry = trapped traders = fast reversal. A poke is not a breakout.
Regime
- Trend — value migrates; edges are continuation entries, not fades; targets reached fast.
- Chop — value stationary; fade edges to POC; bank the rotation, don't overstay.
- High-vol — value violently redrawn; widen stops, size down, demand clear confirmation, trap-flushes pay best.
Confluence and filter
- Confluence — profile level + EMA 12/22/55 + VWAP + fib golden pocket + prior-day level + GEX wall = a setup, not just a level. Two genuine independent tools beat five flavors of one.
- Filter — every trade clears 1:3 R/R or it doesn't exist. The level's beauty never overrides the geometry.
- Housekeeping — erase tagged naked POCs and spent levels. Trade only live, unpaid levels. Watch developing value, not just price.
The levels do the work. Discipline banks it.
Bound by rules, feared by trade.